
Whenever I write posts about Instagram or photography, I inadvertently end up taking a trip down memory lane, browsing my collection of photos past. To me, it’s always interesting to see how much things seem to change and progress without me even realizing it. That’s the best kind of change, isn’t it? The kind that happens so naturally that you forget that wasn’t always the way it was?
If you were to take a scroll through my Instagram account, you would witness one of those changes. The way I do Instagram is constantly changing. I’ve had themes. I’ve had different color schemes. I’ve even had times when I’ve said “enough is enough” and totally abandoned the idea of a cohesive-looking feed.


At times, the complicatedness of today’s Instagram expectations makes me miss 2013/2014, when we’d post whatever without thinking about our 9-photo grid. Then again, the nit-pickiness of Instagram nowadays has forced me to become a better photographer, so I guess it’s a fair trade off.
ANYWAY, I’ve gotten to a place now where I try and maintain an overall look to my photos, but I don’t stress over things that don’t fit together seamlessly. It has allowed me to post a good mix of both personal and more professional-looking photos. And since I really like the way I currently edit my Instagrams, so today I thought I would share it with you all.
I should preface this by saying that I don’t always edit my photos this way; this more of a general guideline rather than a strict step-by-step tutorial. Different circumstances (like lighting, focus, etc.) will cause me to edit my pictures in different ways. There isn’t one specific way I edit my photos because not every photo has the same inherent qualities.
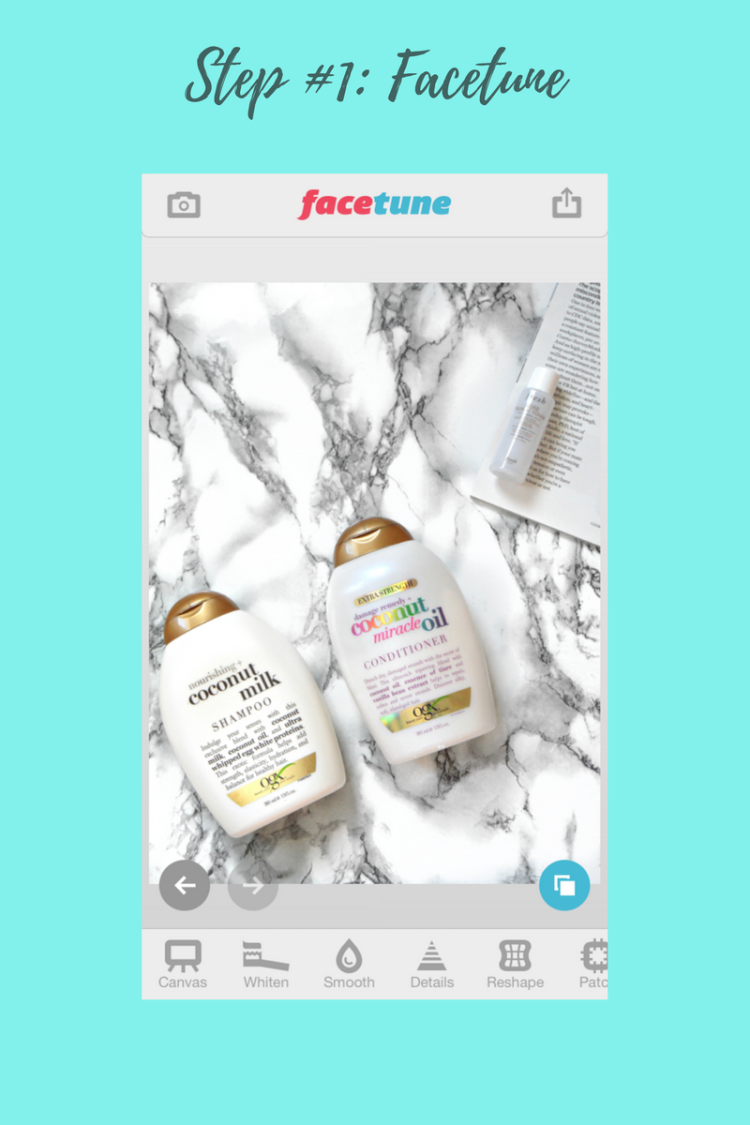
The first thing I will do once I’ve transferred my photo to my phone is open up FaceTune. Facetune has this really handy whitening tool that I love to use. I generally try to maintain a clean, bright look on my Instagram, so this feature works great at removing dull spots and shadows.
Using the whitening tool, I will trace over anything that needs to be brighter. In this shot, for example, the thing in need of brightening is the marble background. While this background is naturally white and gray, it can sometimes show up with a bluish tint on camera. Facetune deletes that problem almost instantaneously.
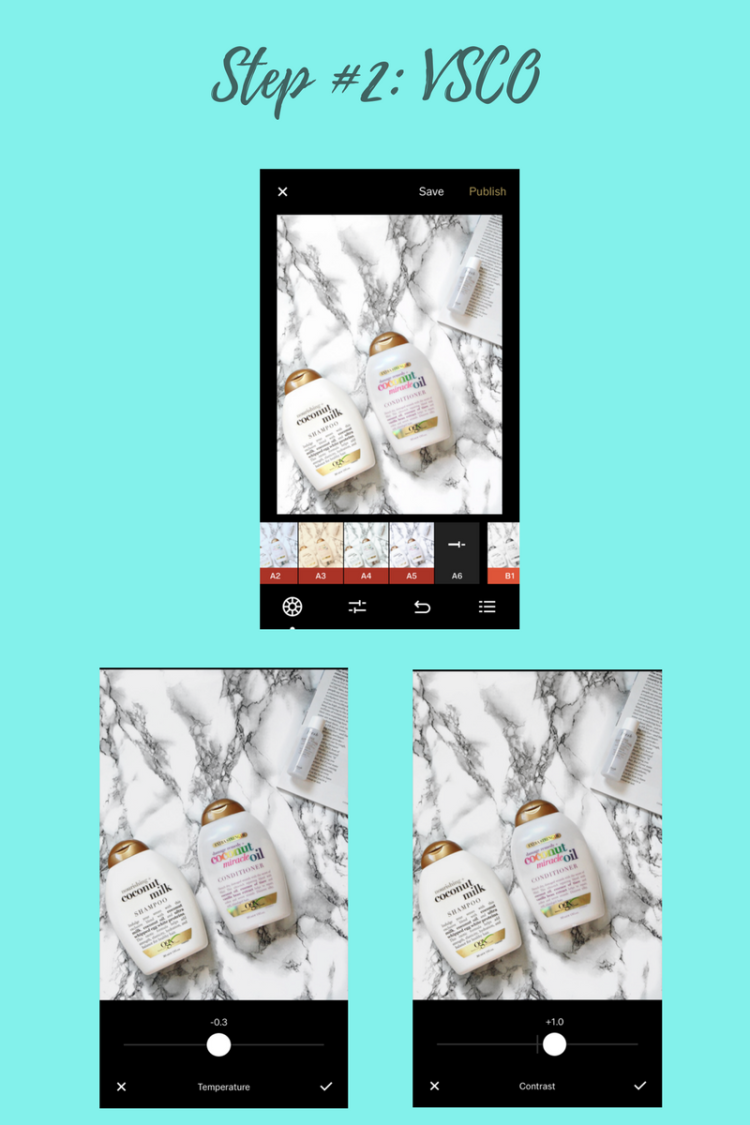
Up next, I’ll head over to VSCO. I am almost certain that every person on Instagram has used or is familiar with VSCO, so I won’t go into much detail explaining it. But basically, I’ll select a preset (the one I am particularly fond of is A6) and adjust it to my liking. Then, I will start editing the other aspects of the photo. In this case, I decreased the exposure, lowered the temperature, and increased the contrast.
Once I’ve done that, I will open up Instagram and compare the newly edited photo to some of my most recent posts. I usually will just check and make sure it fits with the general look of my feed and isn’t too repetitive (when I’ve posted five or six flat lays in a row, I like to mix it up).
Overall, this is a fairly simple editing process that I’ve really come to like. I think I’ll be sticking with it for a while now, as it gives me both flexibility and cohesiveness.
Thank you for reading!
OTHER SIMILAR POSTS:
Why I’ve Quit My Instagram Theme
How do you edit your Instagram photos?

Instagram | Twitter | Bloglovin | Pinterest | Facebook

Facetune is such a godsend I use it for every picture! I‘ve been using PS Express rather than VSCO but still love them equally xo
LikeLiked by 1 person
I know, right?! And I’ve heard such great things about PS Express! I think I’ll have to give it a go!
LikeLike
Great post! I really love using both the apps – Facetune and VSCO are perfect so editing pictures! 😍
LikeLiked by 1 person
Thank you! And they really are!
LikeLike
Fabulous tips! I am loving FaceTune to patch photos. xx
LikeLiked by 1 person
Thank you! And it’s such a handy tool!
LikeLiked by 1 person
Great post and thanks for sharing! Your photos always come out so beautiful!
LikeLiked by 1 person
Thank you so much!
LikeLiked by 1 person
They all look great!!
LikeLiked by 1 person
Thank you!
LikeLike
Instagram is such a challenge for me! I like pages that are genuine and show life events, but at the same time, I know certain looks attract more followers. It can be a difficult balance. XOXO.
http://www.deltahoteljuliet.com
LikeLiked by 1 person
I agree! It really is a challenge!
LikeLiked by 1 person
This is defo the kind of post I have been looking for – this is SO helpful!!xx
LikeLiked by 1 person
Thank you so much! I’m so glad!
LikeLike
Love Facetune! Use it for a lot of my photos, I use Snapseed at the moment but have heard good things about VCSO might need to check it out! X
LikeLiked by 1 person
I hear great things about Snapseed!
LikeLike
Instagram is a nightmare – I think everyone would agree – but I love to hate it. I have never used VSCO I think I definitely need to give it a go!
abbiejadewanders.co.uk
LikeLiked by 1 person
I definitely agree! And it’s really useful!
LikeLike
ooooo these are some good tips my love! xo
LikeLiked by 1 person
Thank you!
LikeLike
About to download face tune now! My photos always have shadows when I take them inside. Thanks for sharing that secret!
Candace
thekelleylog.blogspot.com
LikeLike
Great blog post loved reading this
–
Jack Deyes
jackdeyes.wordpress.com
LikeLike
This is great! I use VSCO but I always want a brighter look! Excited to try FaceTune!
LikeLike