When I first created this blog back in August, I had no idea how important taking good photographs would be. I would snap blurry and grainy pictures on my phone and upload them without a second thought. As I’ve continued to blog, however, I’ve started to realize how pivotal a good blog photo, specifically a flat lay, can be and how it can bring people to your blog. My highest viewed posts feature pictures that I spent time setting up and capturing.
Looking back on the earlier posts I published, I cannot believe the difference in the quality of the images that I use today. While I’m not a professional photographer and certainly have room for improvement, the change has pleasantly surprised me. Today I thought that I would share some of my flat lay strategies in the hope that it will help any bloggers seeking to improve their pictures. These tips have definitely helped me create more eye-pleasing content.
Lighting: I’m starting with the tip that I think is the most important: lighting. Good lighting can drastically transform the quality of an image. In my experience, it doesn’t matter what type of camera you use. It’s all about the light in the photo. I like to use natural light because I think it looks the most open. Taking my blog pictures near windows on cloudy or overcast days gets me the best results. In addition to that, I turn up the brightness on my camera. This makes the background appear very natural and allows the colors in the pictures to pop.
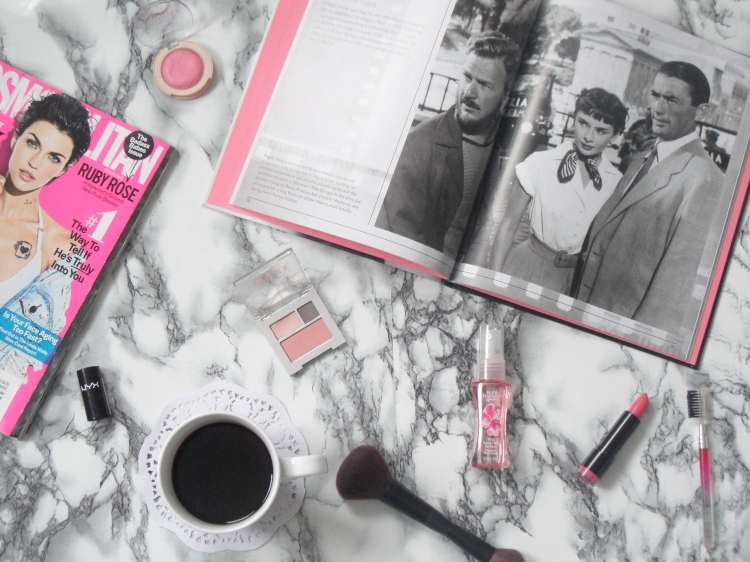
Color matching: One thing that I really believe makes a flat lay look great is when multiple items in the shot contain the same colors. It gives the image a bit of uniformity and helps solidify the flat lay. In these particular pictures, I chose hot pink as my color of focus. I added a book, a magazine, and a handful of pink makeup products and then spread them through the marble to carry the color throughout the photograph. To me, this makes the images much more appealing.
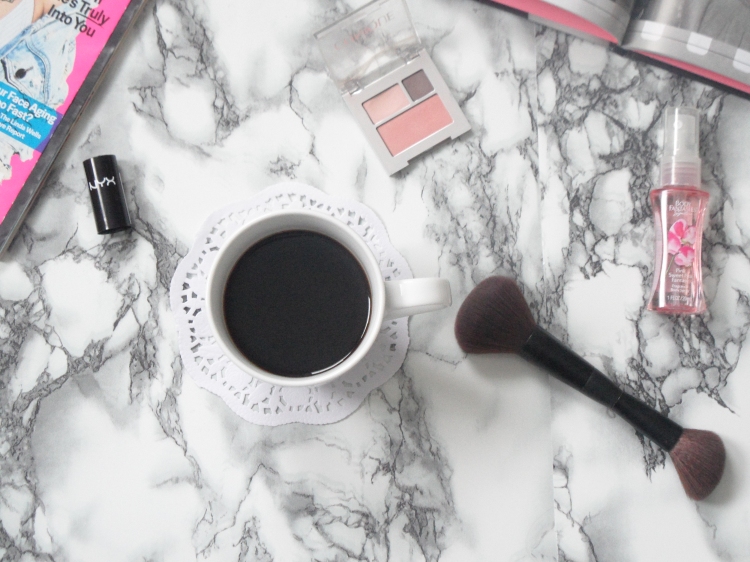
Interesting angles: Changing the angle of a photo not only allows you to use multiple shots of the same layout, but gives an image an entirely new perspective. The images here are of the exact same flat lay. I simply zoomed in on a specific area and captured the picture. This lets viewers get a better shot of the details of the products and makes the photo feel more specific. Try tilting your camera in different ways or standing at different angles as you photograph.
Popular products: It’s common sense that people are interested in viewing posts about products that they have used or recognize. Including items that your viewers may already be familiar with is a fantastic way to spike their interest. I like to place some of my favorite lipsticks and fragrances in flat lays to add a touch of personality. You can do the same thing with notebooks, jewelry, and magazines.
Simple backgrounds: Keeping your background subtle helps viewers see the items in the flat lay more clearly. If your background is too busy, it might distract the viewer from the real focus of the image. I like using white or marble backgrounds. They are simple and clean. Plus, they match everything. Not to mention that they look nice under natural lighting.
Be creative: The best way to think about a flat lay is to not think about a flat lay. Overthinking can take some of the fun and spontaneity out of taking blog photos. Once you’ve got the lighting and background you want, play around with different textures and items. Don’t try to recreate someone else’s flat lay or set it up absolutely perfect. Give yourself the freedom to create whenever inspiration strikes.
Thank you so much for reading. Although I am not an expert, I hope these tips are able to help you with your flat lays.
How do you take flat lays?
Sincerely,
Paige

Didn’t even know what a flat lay was haha..You’re right though, having great photos helps a great deal and just spending time to make everything clear and presentable as possible..Great post xx
LikeLiked by 1 person
I didn’t for a while either haha! And thank you!
LikeLiked by 1 person
Hehe, you’re welcome xo
LikeLiked by 1 person
Really enjoyed reading this post and it gave me lots to think about. xx
LikeLiked by 1 person
Thanks 🙂
LikeLiked by 1 person
Im so glad you posted this as I love your Insta photos and my pics aren’t any where near on that level! I’ve been looking at hints and tips and hopefully mine will get better!! Great post xx
LikeLiked by 1 person
Thank you so much! I love your Instagram photos too!
LikeLiked by 1 person
Ah thanks 😘
LikeLiked by 1 person
This is SUCH an amazing post! I am taking tips from this! I get the lighting thing! That’s my number 1 at the start I wasn’t so worried about lighting in a picture cause I thought oh I’ll edit it to make it brighter, but TBH nothing is as good as natural lighting & pictures with good lighting do get the most likes (on Instagram). I’ve been trying to focus on he quality of my pictures as well these last two months and hopefully I’ve been doing alright 🙈 another thing I learned was that dark backgrounds don’t work well, specially with products that are white cause this weird thing happens with the contrast so I’ve been trying to avoid that! I wish I had a marble worktop to take pictures on! P.s your pictures look lovely! 💋
https://thetypicalbeautyblog.wordpress.com
LikeLiked by 1 person
I’m glad you liked it! I agree that dark backgrounds don’t work well. If you want a marble background, I suggest checking Amazon or a hardware store! You can find marble laminate for pretty cheap!
LikeLiked by 1 person
No way! Thanks for the tip! I had no idea. I will be checking it out xx
LikeLike
This was actually so helpful, thank you so much. Praying for an overcast day in the near future so I can get all my blog photos done at once haha
LikeLiked by 1 person
Thank you! I’m hoping for the same thing haha
LikeLike
Really good tips!! Will definitely try those out ☺☺
LikeLiked by 1 person
Thank you!
LikeLiked by 1 person
The cloudy look is good but if there’s no cloudy days and you still want the look it gives, I put a white bed sheet as a curtain on the sunniest window in the house and it looks just as good!
LikeLiked by 1 person
I’ll have to try that! There haven’t been a lot of overcast days lately. Thanks!
LikeLiked by 1 person
Found this post so usefull! Thank you. Jess x
LikeLiked by 1 person
You’re welcome!
LikeLiked by 1 person